About this tutorial
In this brief tutorial I’ll walk you through a simple blockchain in less than 50 lines of Python 2 code. It’ll be called SeanCoin.
Introduction
Blockchain is changing the way businesses conduct transactions. This secure, distributed, and open technology is lowering costs, speeding up processes, and building a new level of trust in secure interactions. When something as big as blockchain emerges, developers who understand and can implement the technology are in the driver’s seat. But first you have to learn it.
For anyone wondering how to get started with blockchain, this developer journey is for you. This journey is a composite, comprising a set of granular developer journeys that take you through the process of building a working blockchain application step by step.
In more general terms, it’s a public database where new data are stored in a container called a block and are added to an immutable chain (hence blockchain) with data added in the past. In the case of bitcoin and other cryptocurrencies, these data are groups of transactions. But, the data can be of any type, of course.
Blockchain technology has given rise to new, fully digital currencies like bitcoin and Litecoin that aren’t issued or managed by a central authority. This brings new freedom to individuals who believe that today’s banking systems are a scam or subject to failure. Blockchain has also revolutionized distributed computing in the form of technologies like Ethereum, which has introduced interesting concepts like smart contracts.

Creating our own blockchain
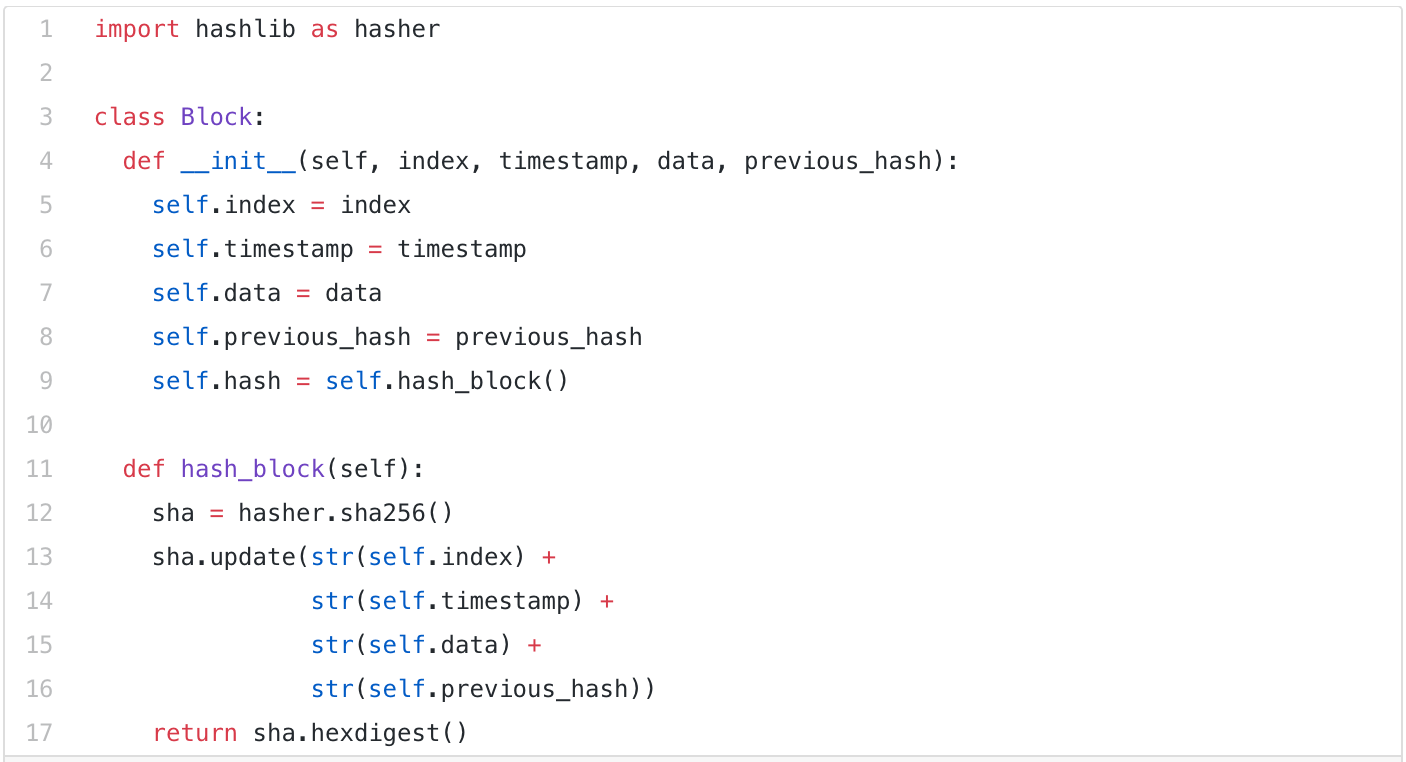
We’ll start by first defining what our blocks will look like. In blockchain, each block is stored with a timestamp and an index (optional). In SeanCoin, we’re going to store both. And to help ensure integrity throughout the blockchain, each block will have a self-identifying hash. Like bitcoin, each block’s hash will be a cryptographic one of the block’s index, timestamp, data, and the hash of the previous block’s hash. The data can be anything you want.
Awesome! We have our block structure. But since we’re creating a blockchain, we need to start adding blocks to the actual chain. As I mentioned earlier, each block requires information from the previous one. That being said, how does the first block in the blockchain get there? Well, the first block (genesis block) is special. In many cases, it’s added manually or has a unique logic allowing it to be added.
We’ll create a function that simply returns a genesis block to make things easy. This block is of index 0, and it has an arbitrary data value and an arbitrary value in the “previous hash” parameter.

Now that we’re able to create a genesis block, we need a function that will generate succeeding blocks. This function will take the previous block in the chain as a parameter, create the data for the one to be generated, and return the new one with its appropriate data. When new blocks hash information from previous ones, the integrity of the blockchain increases. If we don’t do this, it would be easier for an outside party to change the past and replace our chain with an entirely new one of their own.
This chain of hashes acts as cryptographic proof and helps ensure that once a block is added to the blockchain it cannot be replaced or removed.

That’s the majority of the hard work. Now, we can create our blockchain! In our case, the blockchain itself is a simple Python list. The first element of the list is the genesis block. And, of course, we need to add the succeeding blocks. Because SeanCoin is the tiniest blockchain, we’ll only add 20 new ones. We can do this with a for loop.
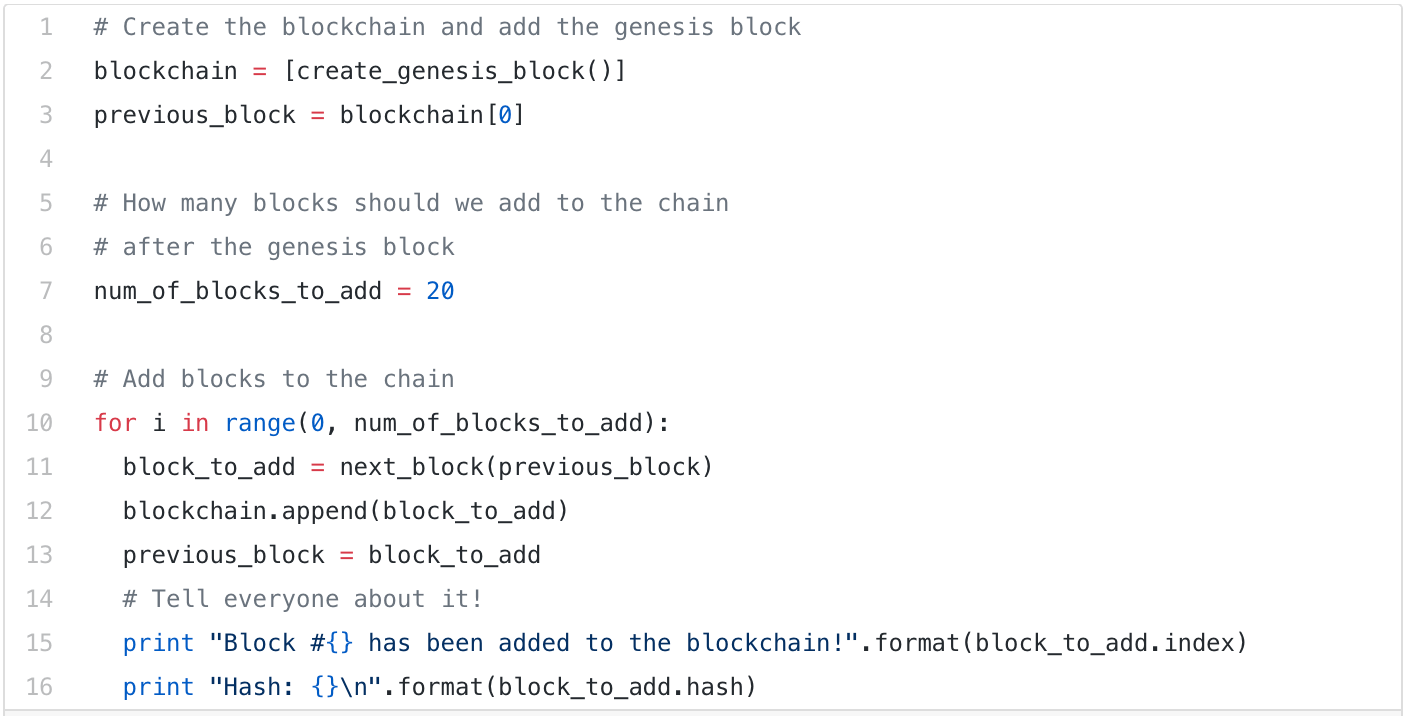
Let’s test what we’ve made so far.
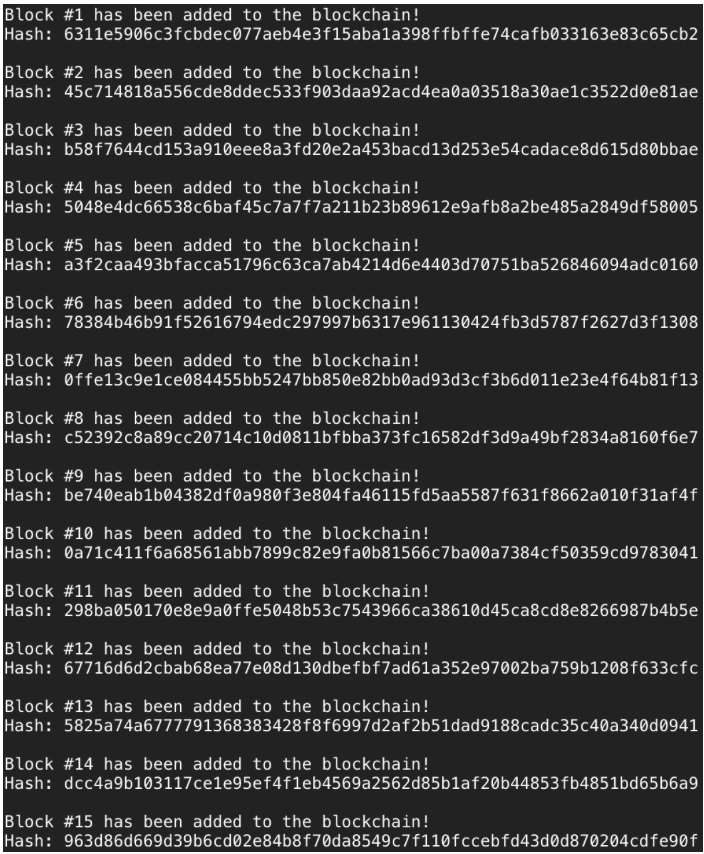
Don’t worry, it goes up to 20.
There we go! Our blockchain works. If you want to see more information in the console, you could edit the complete source file and print each block’s timestamp or data.
That’s about all that SeanCoin has to offer. To make SeanCoin scale to the size of today’s production blockchains, we’d have to add more features like a server layer to track changes to the chain on multiple machines and a proof-of-work algorithm to limit the number of blocks added in a given time period.
If you’d like to get more technical, you can view the original bitcoin whitepaper here. Best of luck and happy hacking!
Thank you very much for reading!
Hope this interactive guide to writing Blockchain in Python help to understand the basic of the future tech.